Garage installation & base laying
KLN garages and sheds are designed to be erected on a level base that is firm and strong. The benefits of a base of this type is that you will enjoy a prolonged life for the shed or garage. It will also deliver more stability and combat some issues such as the possibility of badly fitting doors and windows that could be the result of not having a level foundation.
We can offer the following services:
- Lay new concrete bases or extend existing ones
- Erect your new pre-fabricated concrete garage, shed or workshop
- Dismantle and dispose of old buildings
- Site clearance
- Additional works such as patio laying, fencing, brick walls etc
Contact us for a quote.
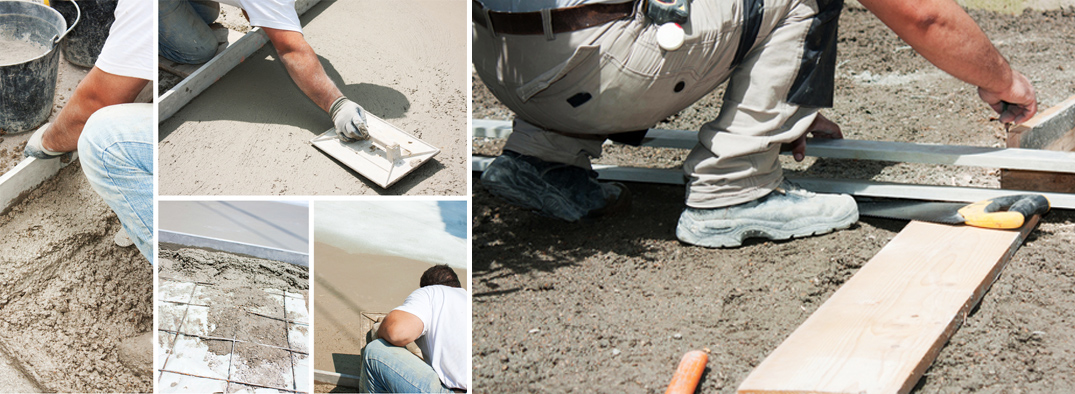
Laying your own concrete garage base
Many of our clients opt to lay their own concrete base for their shed or garage. Here’s our recommended method:
- Select site. Your first decision will be where to position your shed. We recommend that you use string and pegs to measure out the base 5cm or 2” larger than the building. Keep in mind that you are likely to want access to all sides, a garden building provides excellent storage options for flowerpots, wheelbarrow and other items that you are not planning on storing inside of it. Now measure both diagonals to ensure that they are the same length.
- Prepare the ground. In order to build a base that is firm and stable, you will need to use 7.5cm or 3” of hardcore beneath the concrete layer. You may opt to keep the base level with the ground or to raise it higher. To make it level, dig out top earth until you reach 15cm or 6’’ deep. This will be enough depth to cater for both the hardcore and an additional 7.5cm or 3” of concrete. Now level the area using a rake and remove your pegs.
- Set up levelled framework. You will need to measure, cut and then fit timber around the edges of your base area. This will contain the concrete. To ensure that you will have an even area, measure the diagonals. It’s also advised that a spirit level is used to check how level the framework is. This is what will determine whether your base is 100% level. Now lay your hardcore into the framework and add sand to the top.
- Prepare concrete. To mix concrete, use either pre-mixed concrete with water, or you can use 1 part cement with 5 parts ballast. We recommend that you take your time to carefully add small measures of water so that your concrete is dryer than it is wetter.
- Spread concrete. Now add the concrete to the layer of sand. It should sit slightly proud of the framework. This can be levelled off with a piece of timber, using the framework as a guide.
- Leave concrete to dry. If there is a forecast for wet weather, then use polythene to protect the drying concrete for 24 hours. If hot weather is forecast it is recommended that the concrete is covered with damp sacks. Keep the sacks damp by sprinkling with water so that the concrete does not dry to fast which will cause cracking.